How to harden your home against wildfires. This article will discuss methods to protect your home against wildfires. While most articles and websites seem to focus mostly on trees, bushes, and brush around your home and the 30 foot and 100 foot zones, this article focuses on your home itself. I won’t be talking too much about the zones, as there are many other sites that do a great job of explaining them. I also am concentrating a lot of this article to the types of things I did around my home, some of which are based on how the home was built, and features included in it. I am not including things like skylights, since I don’t have any. However, skylights and many other things to look at are included in this great article.
I only learned in the last few years that the biggest danger to my home was from blowing embers, or firebrands, not a huge wall of flames. I can keep the wall of flames from my home by following rules of keeping trees, limbs, bushes, brush, and dead pine needles and leaves from around the home. But how do I keep the home protected from a storm of embers blowing at the home, possibly hundreds of thousands of burning embers. Ember can pile up causing a fire. Becuase they are blown and swirl around with the winds, the embers can find entry points into your home and set it on fire.
Information in this article comes from a firefighter, showing me the spots I needed to pay attention to, as well as a few articles which did show how to protect your home itself. I live in an extreme fire danger area. I decided a couple years ago if, or more probably when, a fire comes through here, I want my home to survive. The current building code says new homes need to be built of siding that won’t catch on fire. My home was built before these new laws came out.
In California, they don’t have a third zone, the 0-5 foot zone around your home. In this zone, you basically want to keep out anything flammable at all. No firewood, no flammable mulch like bark, no dead leaves or pine needles. It is best to keep bushes away from the home, and away from the windows. You want the five foot zone to be pristine at all times during fire season. I like the idea of this third zone.
The goal is to keep embers from entering your attic, or any other spots they can collect and set your home on fire. Attic vents, cracks around the vents or blocks between the rafters, or any other cracks in the wood in your home may have. Decks are another area of high danger.
Bushes right up against your home can be a major problem if those catch on fire. Remove bushes near the home, or trim them smaller. Trim bushes up off the ground so you can keep leaves and debris cleaned up under them.
Windows can be a danger area. Keep them closed when a fire approaches. Dual pane windows are better, as they resist breaking as they heat up, with it cool on one side, and super hot on the other. A dual pane tempered glass window is best. If you replace your windows, get tempered glass. If even one window breaks, get the glass replaced with tempered.
Make a List
You may want to have a list of things to do if a fire is approaching your home. Stay safe, if you have no time, you may need to leave without looking at your list. Throughout this article, remember you and your families safety is the most important thing, and it is up to you to decide when it is time to leave your home. These are just some of the things I’ve researched, and what I am doing around my home. I am not a fire expert.
There are some things to think about ahead of time. You probably want at least a couple long hoses with nozzles, ready in case you can use them against a fire. You may want to have masks for the people in your home to be able to breath. You may also want to have googles, as you don’t want blowing embers hitting your eyes.
Your list should be in order of the most important things first, as you may not have time to finish your list. One of the most important things is to close all windows, garage doors and doors. You don’t want embers getting into your home. Move all plastic lawn furniture and plastic trash barrels away from the home. Move anything flammable you see away from the home, including propane tanks. Don’t store your firewood against the house or under a deck. A lot of the items may possibly be brought inside the house, or put them in your pool. Go through this long pdf article and find other things to add to your list, or this web page with multiple short pdf articles.
The list is for things that may be in the wrong place at the last minute. Obviously, the list isn’t meant for major items that should have been fixed long before the fire gets there. You want your home ready for a fire at a moment’s notice. The list should be for small things like close the windows, grab your mask and goggles, or move a couple pieces of plastic lawn furniture away from the house.
Attic Vents
Attic vents are the largest danger to your home. Screen that is 1/4″, is too large and will allow a lot of embers to enter the attic. Screen that is 1/8″ is much better, but embers will still get in through this. They will be smaller, and less of them however. Don’t keep anything flammable in your attic like newspapers or cardboard boxes. These could be the first things to catch on fire.
Keep in mind that using Brandguard vents will make the amount of vent area to your attic less. You may need to add more vents to make up for that. Since I’d previously added two of the spinning turbine vents on top of my roof many years ago, this should be plenty of vent space for my home.
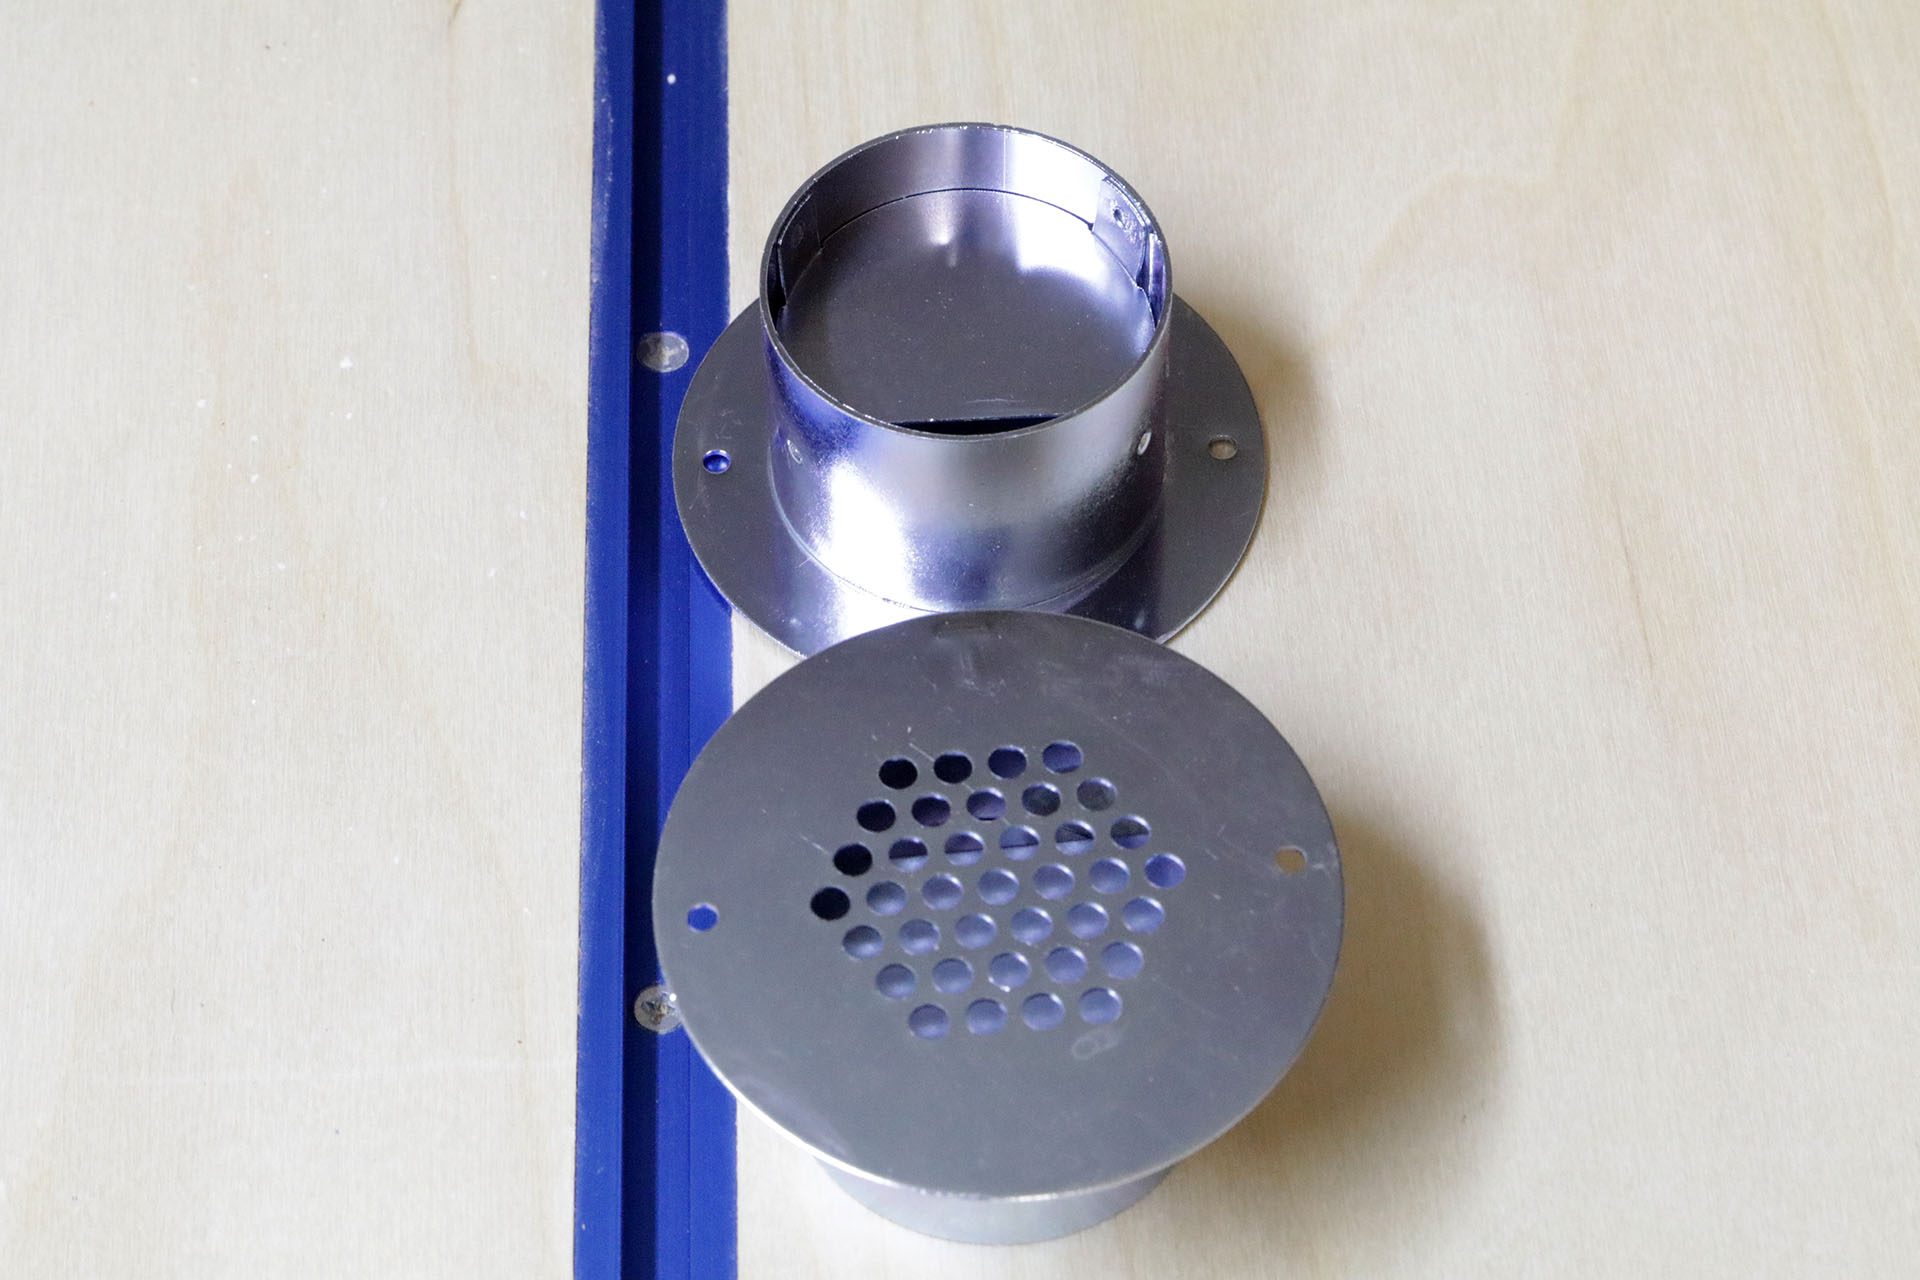
Speaking of the turbine vents, or Whirlybird vents; make sure these are protected from embers also. I added the 1/8″ vent screen on the inside of my vent to keep embers from going into the attic. I removed the turbine part from up on the roof. Then my 1/8″ attic screen wasn’t large enough to make a 14″ circle, so I cut two pieces, and wired them together into a 14″ circle. I made sure they were slightly larger than 14″, so it would be a snug fit. Then I caulked around the edges to hold it in place.
I used a roll of 12″ wide Kwikmesh 1/8″ galvanized steel screen. Wear gloves! This screen is very sharp. I used tin snips to cut the screen.
The first thing I did was start caulking up the attic vent area, between the rafters and around the existing vents. You do not want embers getting into your home through these cracks. I used a lot of caulk to fill these cracks. A lot of the cracks were large. Look for any other cracks in your siding, around your windows or doors that may also need to be sealed up with caulk. All it takes is one spot you missed to be a danger spot. I used clear caulk, it’s white when applied, but dries clear. Be warned, the type I used seems to collect dirt, and if left unpainted does get dark from the dirt attached to it. It is paintable, and looks great once painted.
Replace any vents with holes in the screens, or repair the holes. Make sure the vents use 1/8″ or smaller screen.
I’d been reading about the three companies that made fire approved vents to be used in California, and decided to change all my vents to Brandguard vents. They have a metal baffle system in all their vents to keep embers from entering the vent. In the back, they have 1/8″ screen in the back of the vents. I put in an order with the company, and received my vents pretty quickly. They seem to be made very well, much better than the vents you get at your local big box store.
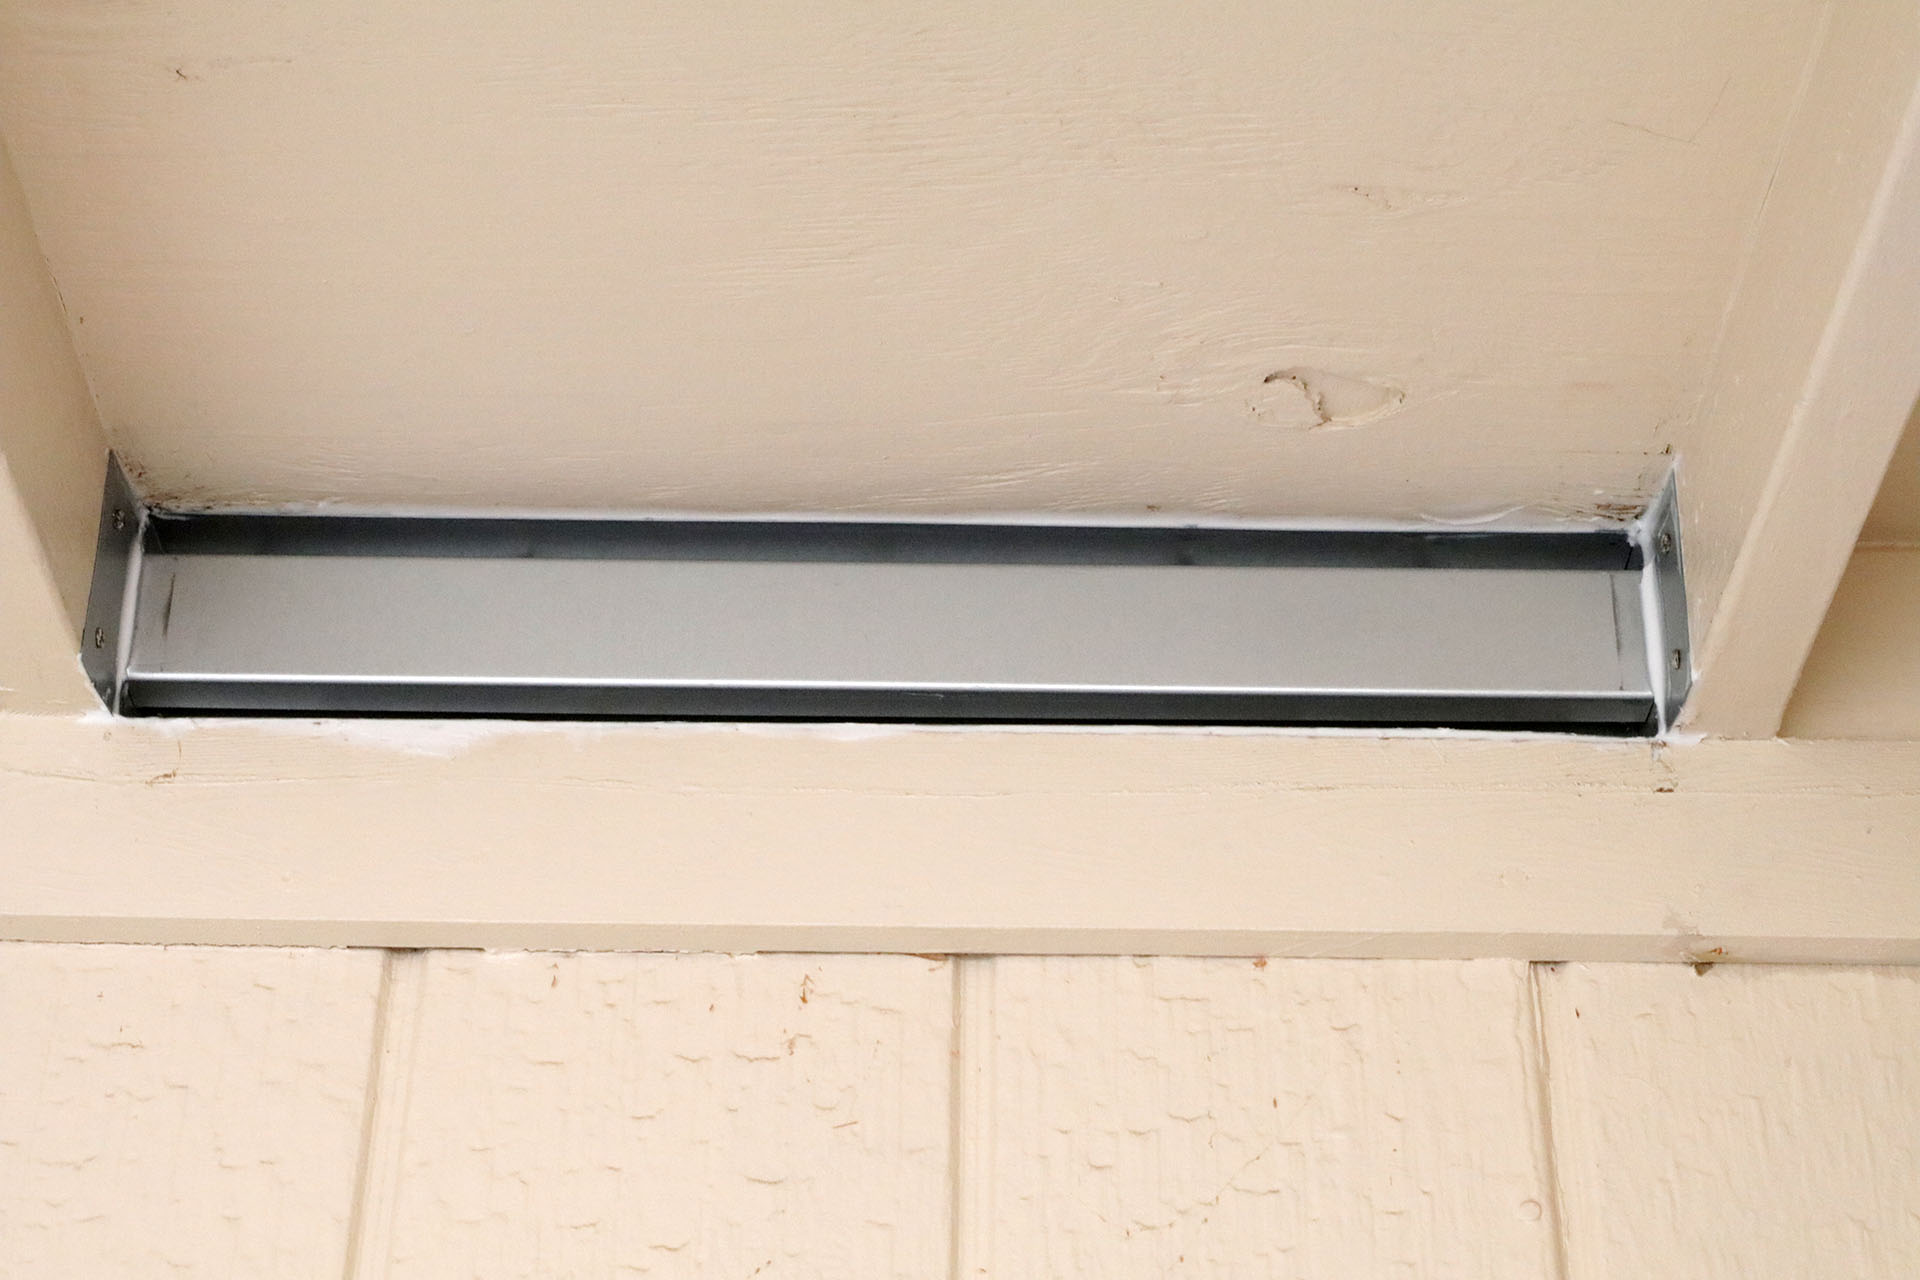
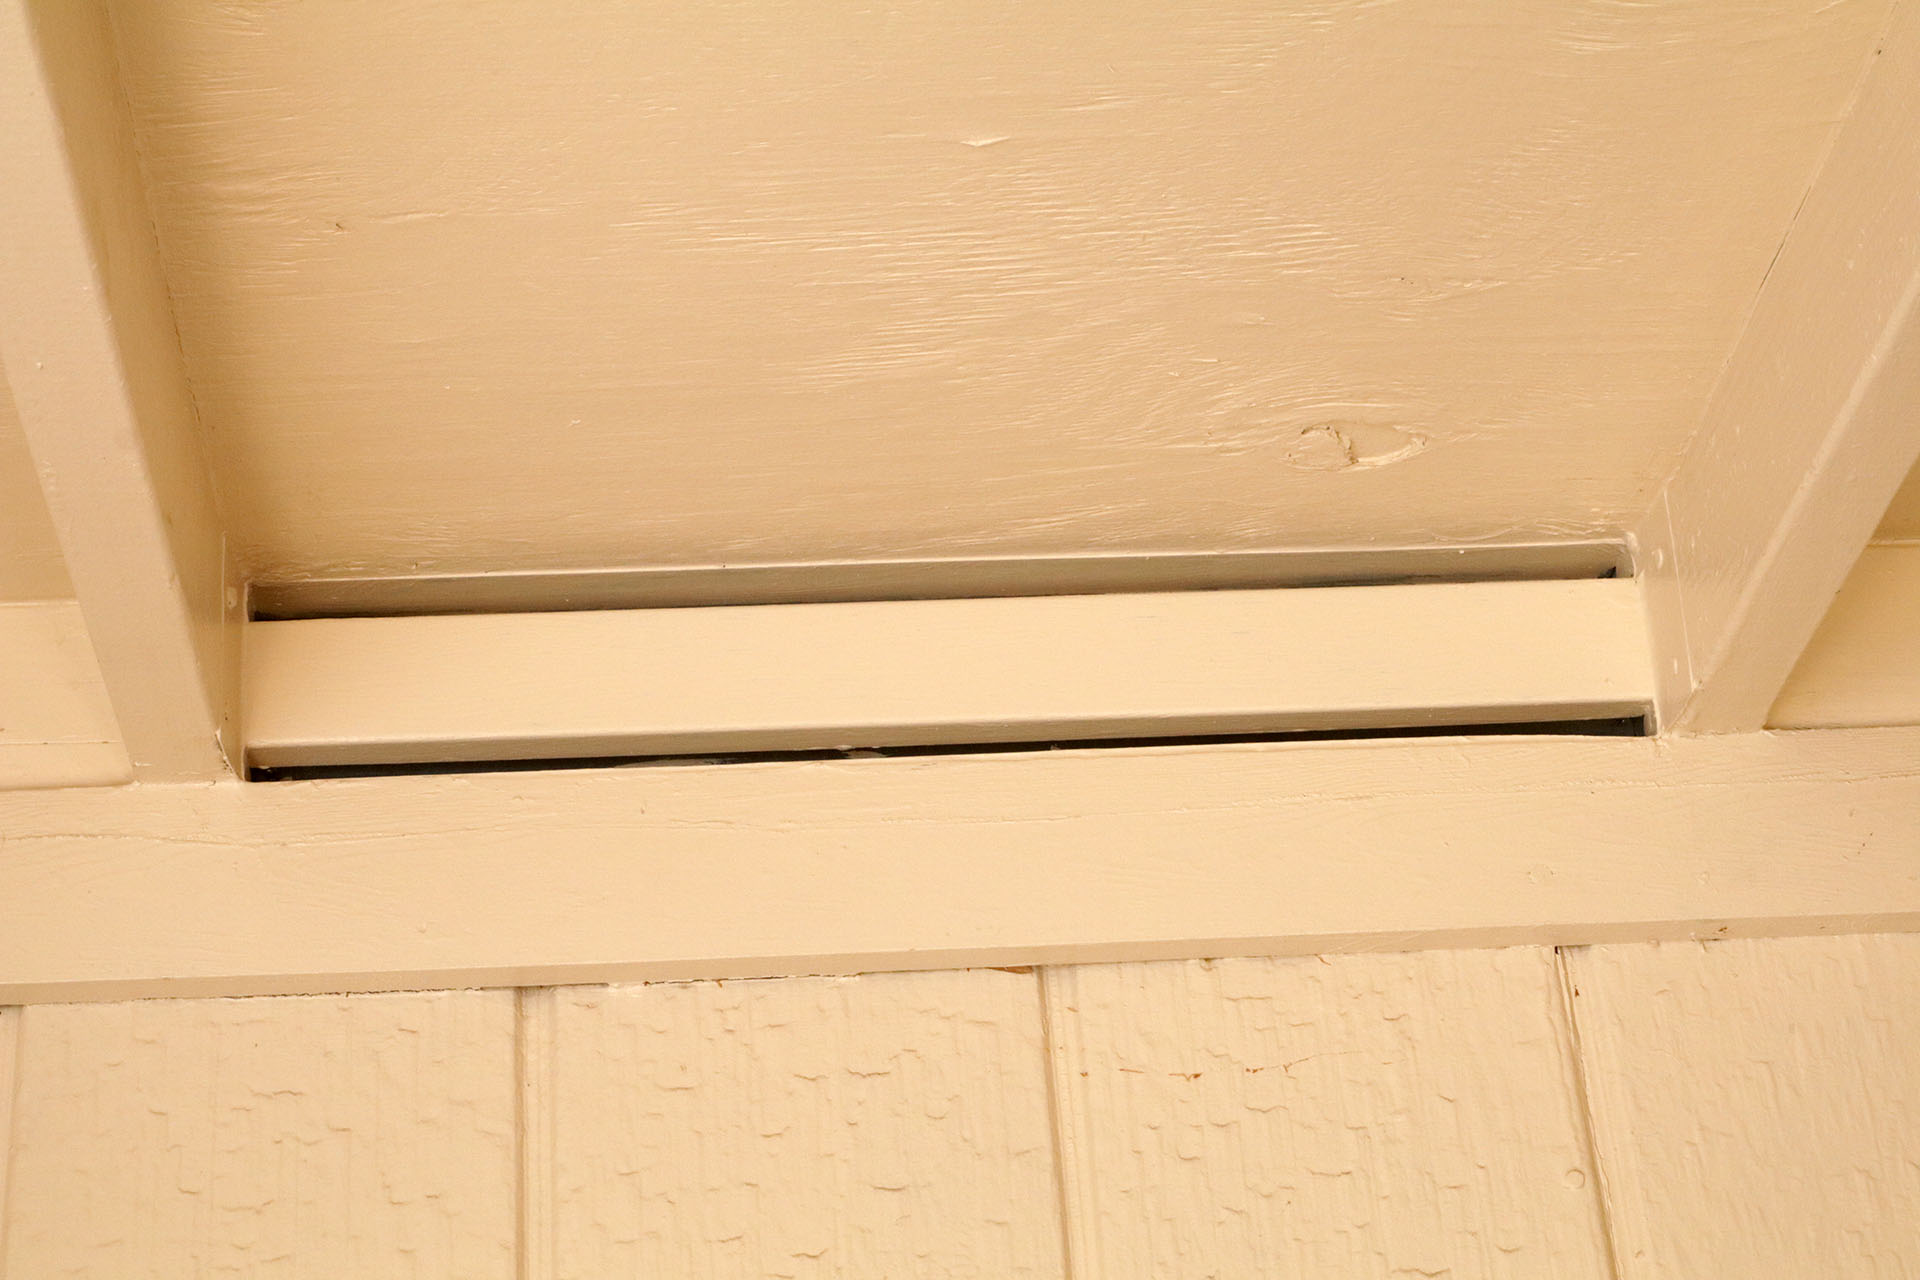
The eve vents between the rafters were fairly easy to switch. The old vents nailed from the ears on the outside, so I removed those nails and popped out those vents. I made sure the new Brandguard vent would fit, and needed a rasp on some of the 1×4″ boards under those to slightly widen the gap. Then the new vent slid right in place. I nailed those in, and then caulked all around them so no embers would get in around the edges of the vent.
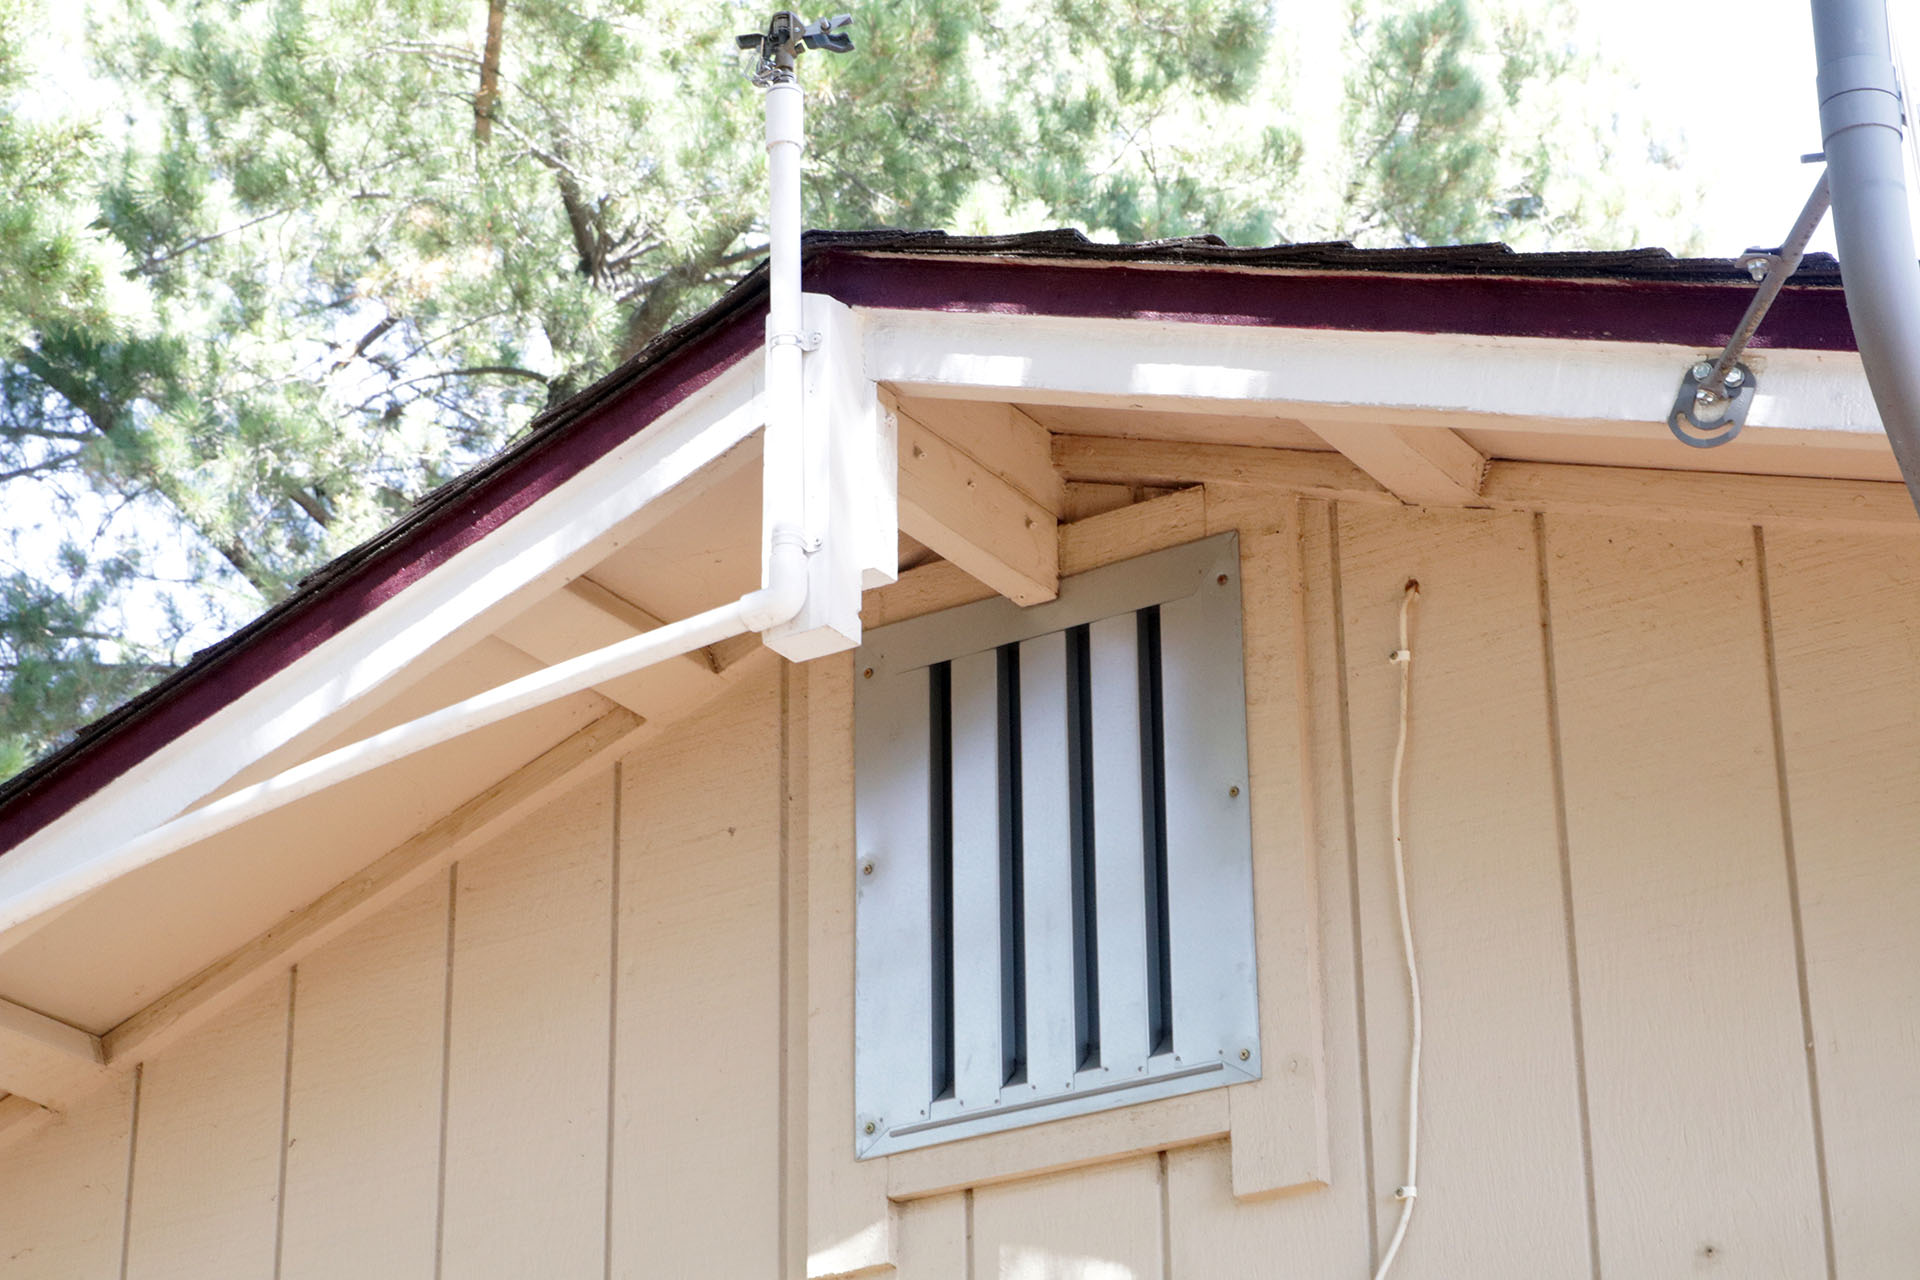
The two gable vents I have were also replaced. The gable vent is one of the more dangerous ones to catch a home on fire. To fit the Brandguard vent in place, I found a video which said you needed to leave the old vent in place, except pull out the horizontal pieces. I purchased the retrofit type with the flange in the front. I removed all the horizontal pieces, and found out the new vent still would not fit, and I pretty much had to dismantle the entire old gable vent, piece by piece. It wasn’t too bad and only took a few minutes. Then the new vent fit right in, I caulked around the opening, put it in place, screwed it in, then finished caulking around the new vent.
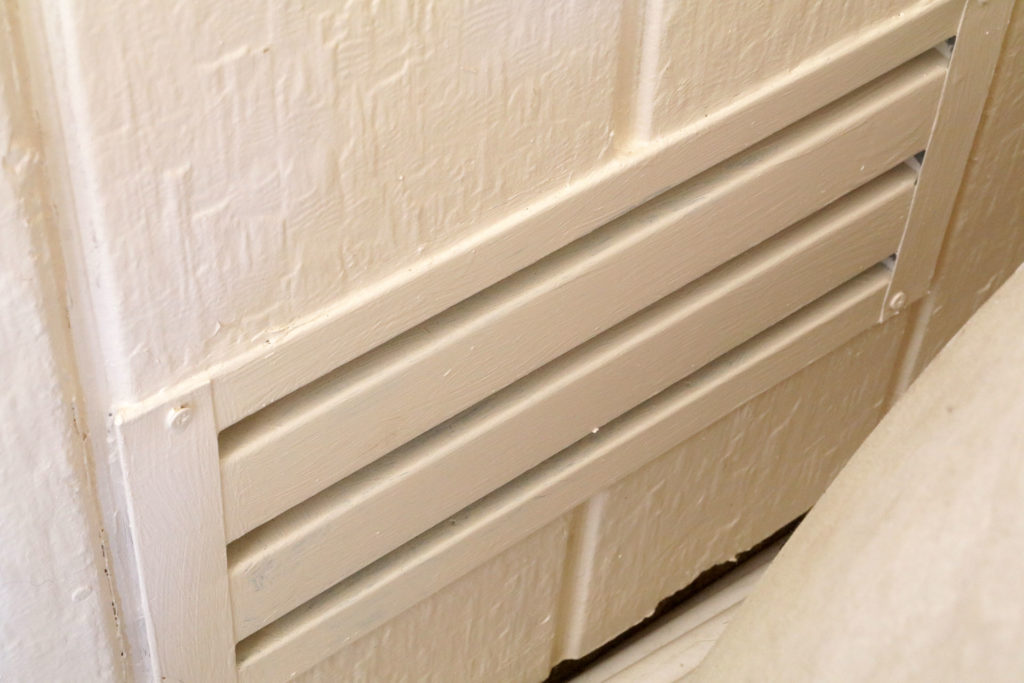
I had two foundation vents in the back of my garage. I replaced those with Brandguard vents with the flange in the front (I didn’t have to remove the siding). I was able to easily remove the old vents. Same procedure, I caulked around the opening, put this new vent in place, and screwed it in, and then caulked around the edges.
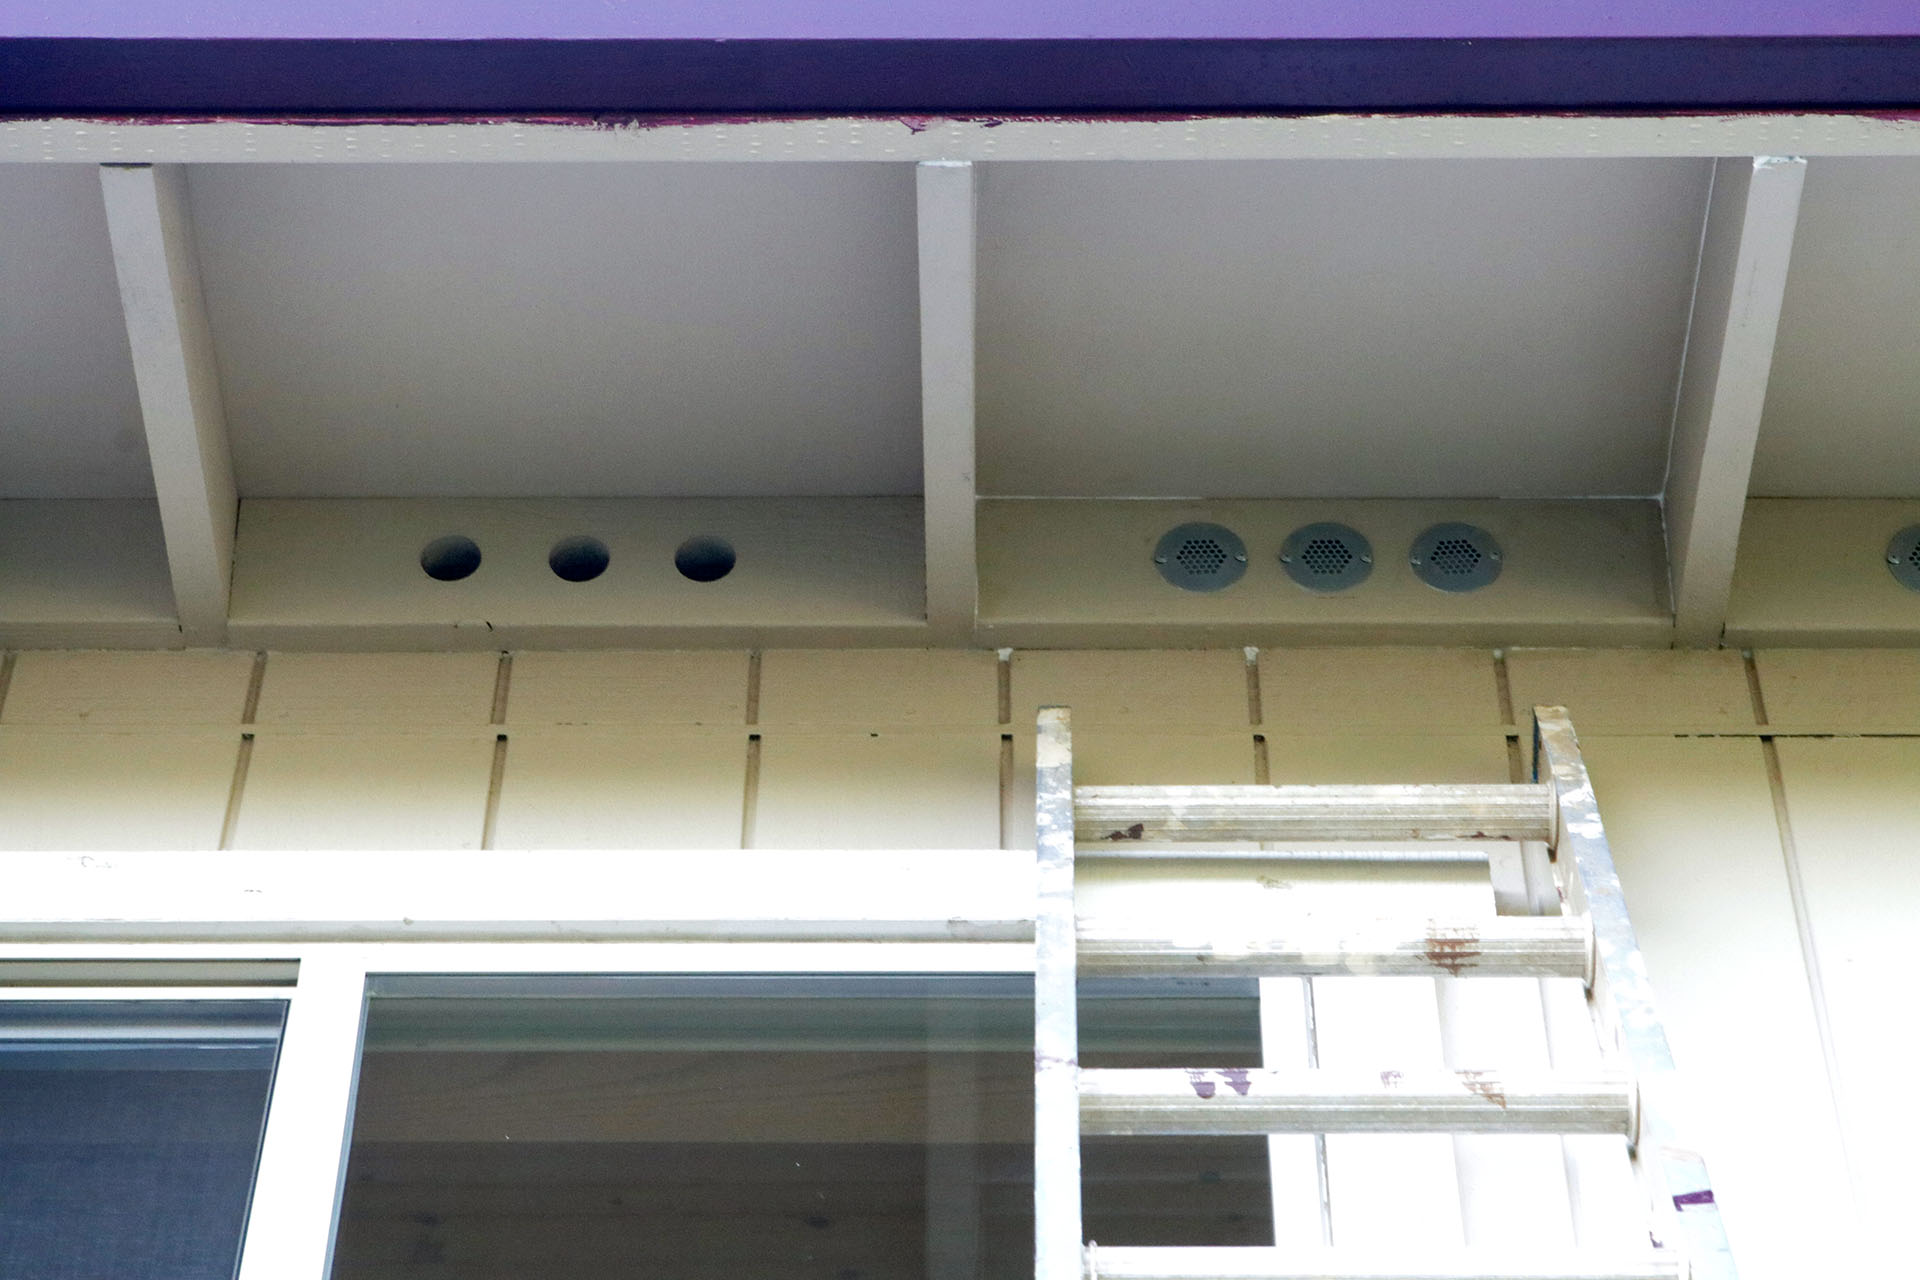
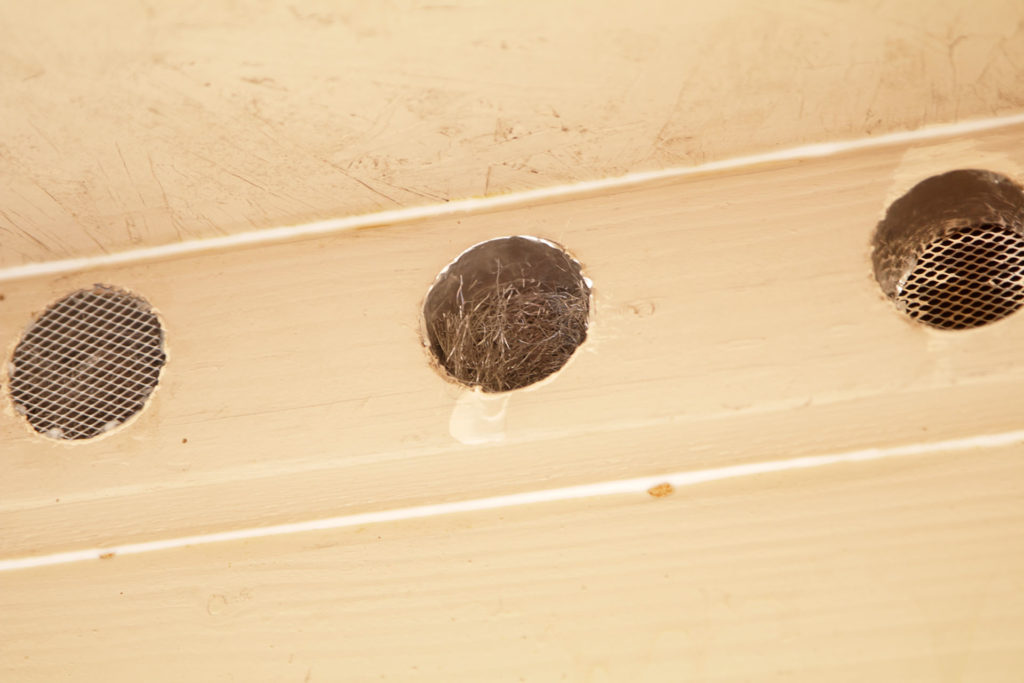
My upstairs had three 2″ hole vents with screen in the back between each pair of rafter tails. Unfortunately the screen was the larger 1/4″ screen, and wasn’t even attached firmly, so it would bend away from the board and leave a wide opening. That’s bad news for a fire and embers! I purchased the Brandguard 2″ hole vents to put in these. I figured I’d just pop these in, screw them on, and they’d be done. These turned out to be the most difficult and time consuming vents. And I was up the extension ladder the entire time.
The 2″ hole vents are a full two inches. They actually measure 7 to 14 thousands of an inch over two inches. I made a hole in a 2×4 with a 2″ hole saw, and the vent did pop in, with a tight fit. But think about the hole vents in your home. They were cut into green lumber. And probably painted after that, decreasing the opening a slight amount. What happens when green wood dries? It can shrink, warp, cup, twist and move all around. Not a single one of those hole vents went into any of the 76 holes in my upstairs.
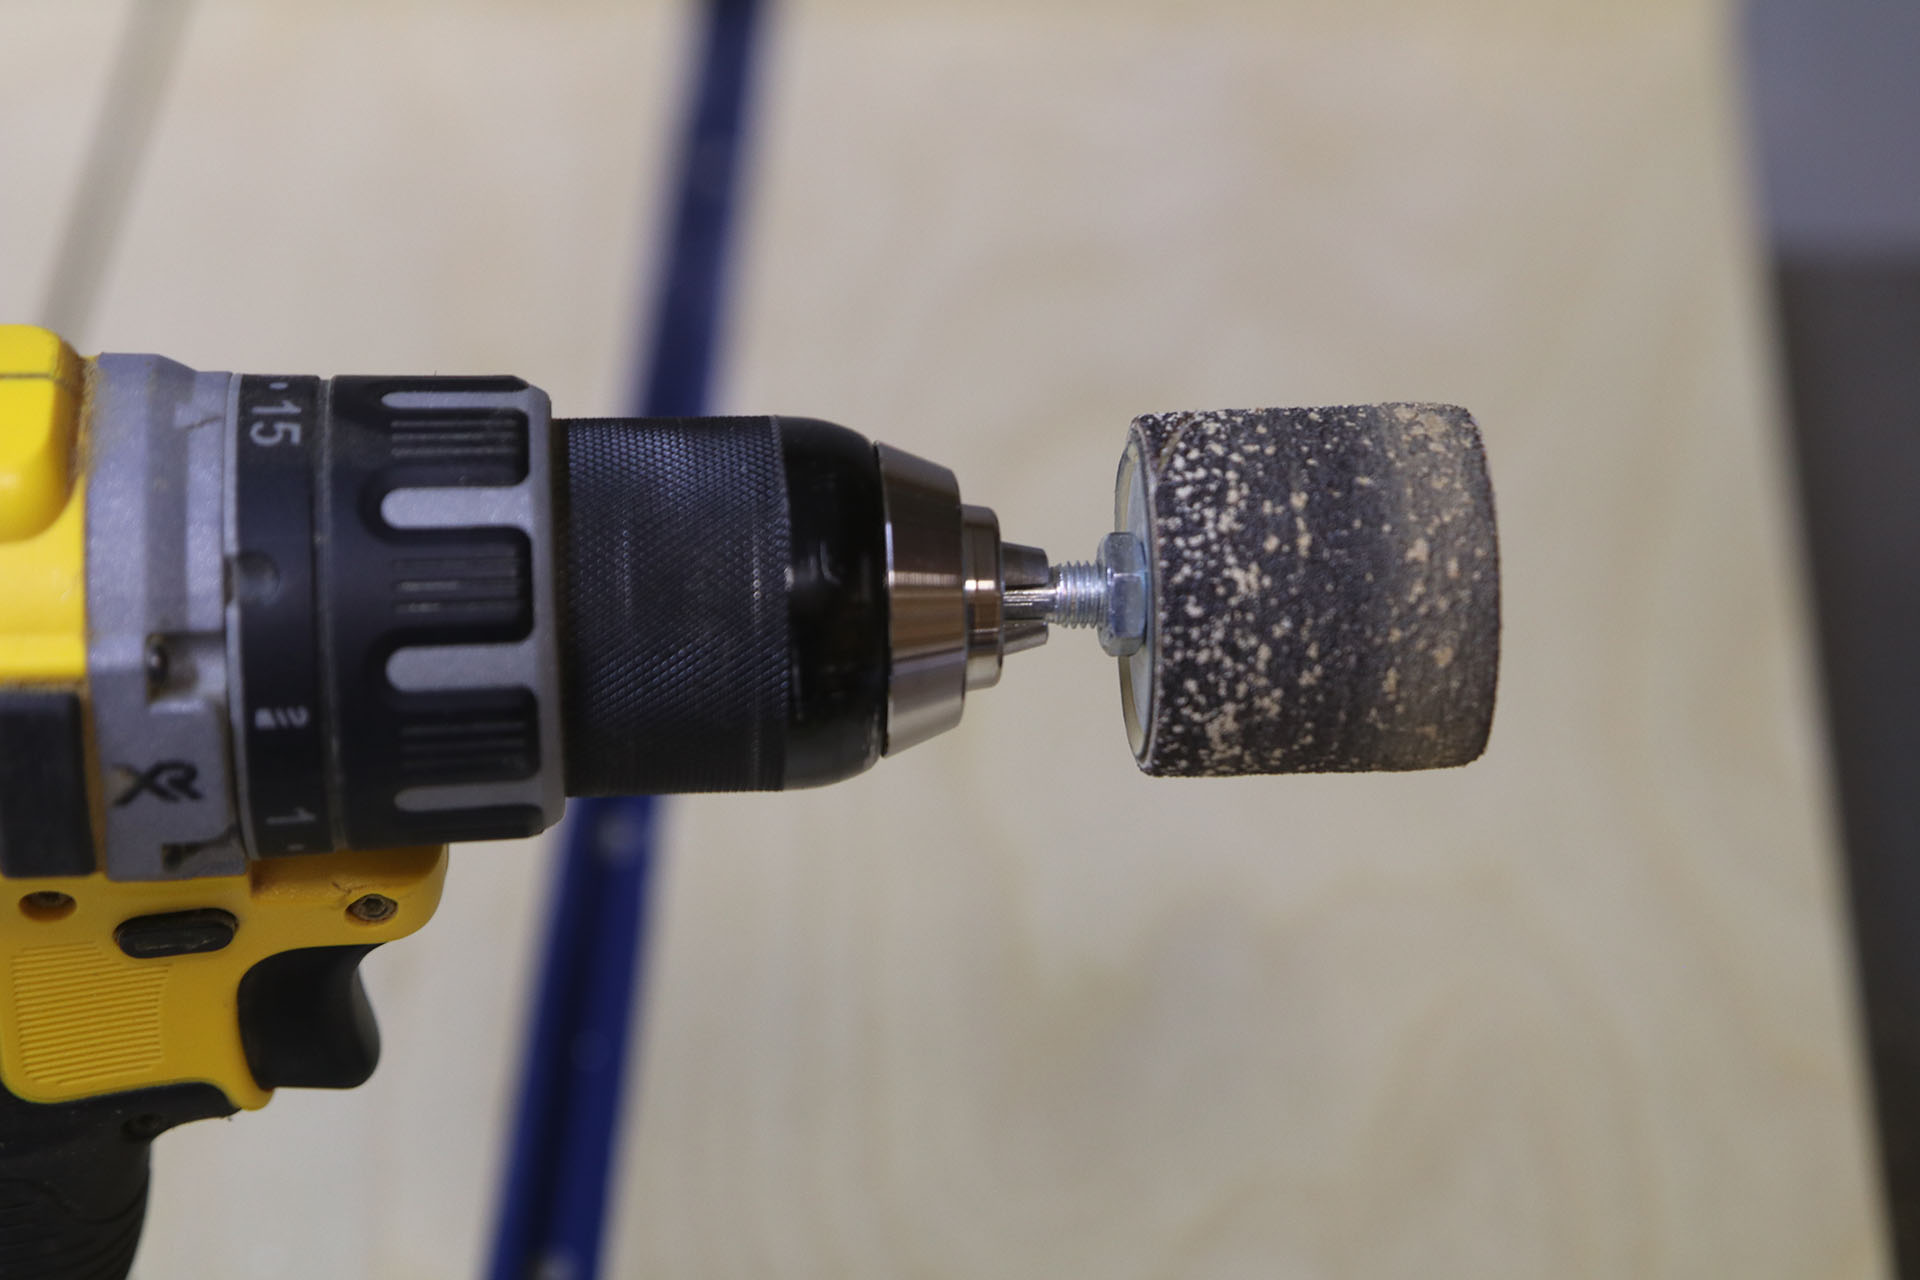
I tried using the 2″ hole saw with a door hinge pin in it instead of a drill bit. I had to temporarly screw on a 2×4″ pieces with a 2″ hole in it to guide the hole saw. The door hinge pin would push against the screen and hopefully keep the saw from tearing the existing screen out. The 2″ vents would still not fit. I then used a 1.5″ x 1.5″ sanding drum on my drill, and sanded the opening large until the vent would pop in the hole. I gave up on the hole saw, and just used the drum sander for the rest of the holes, that was far easier. The sanding drums would get clogged easily, so I used several of those for the project.
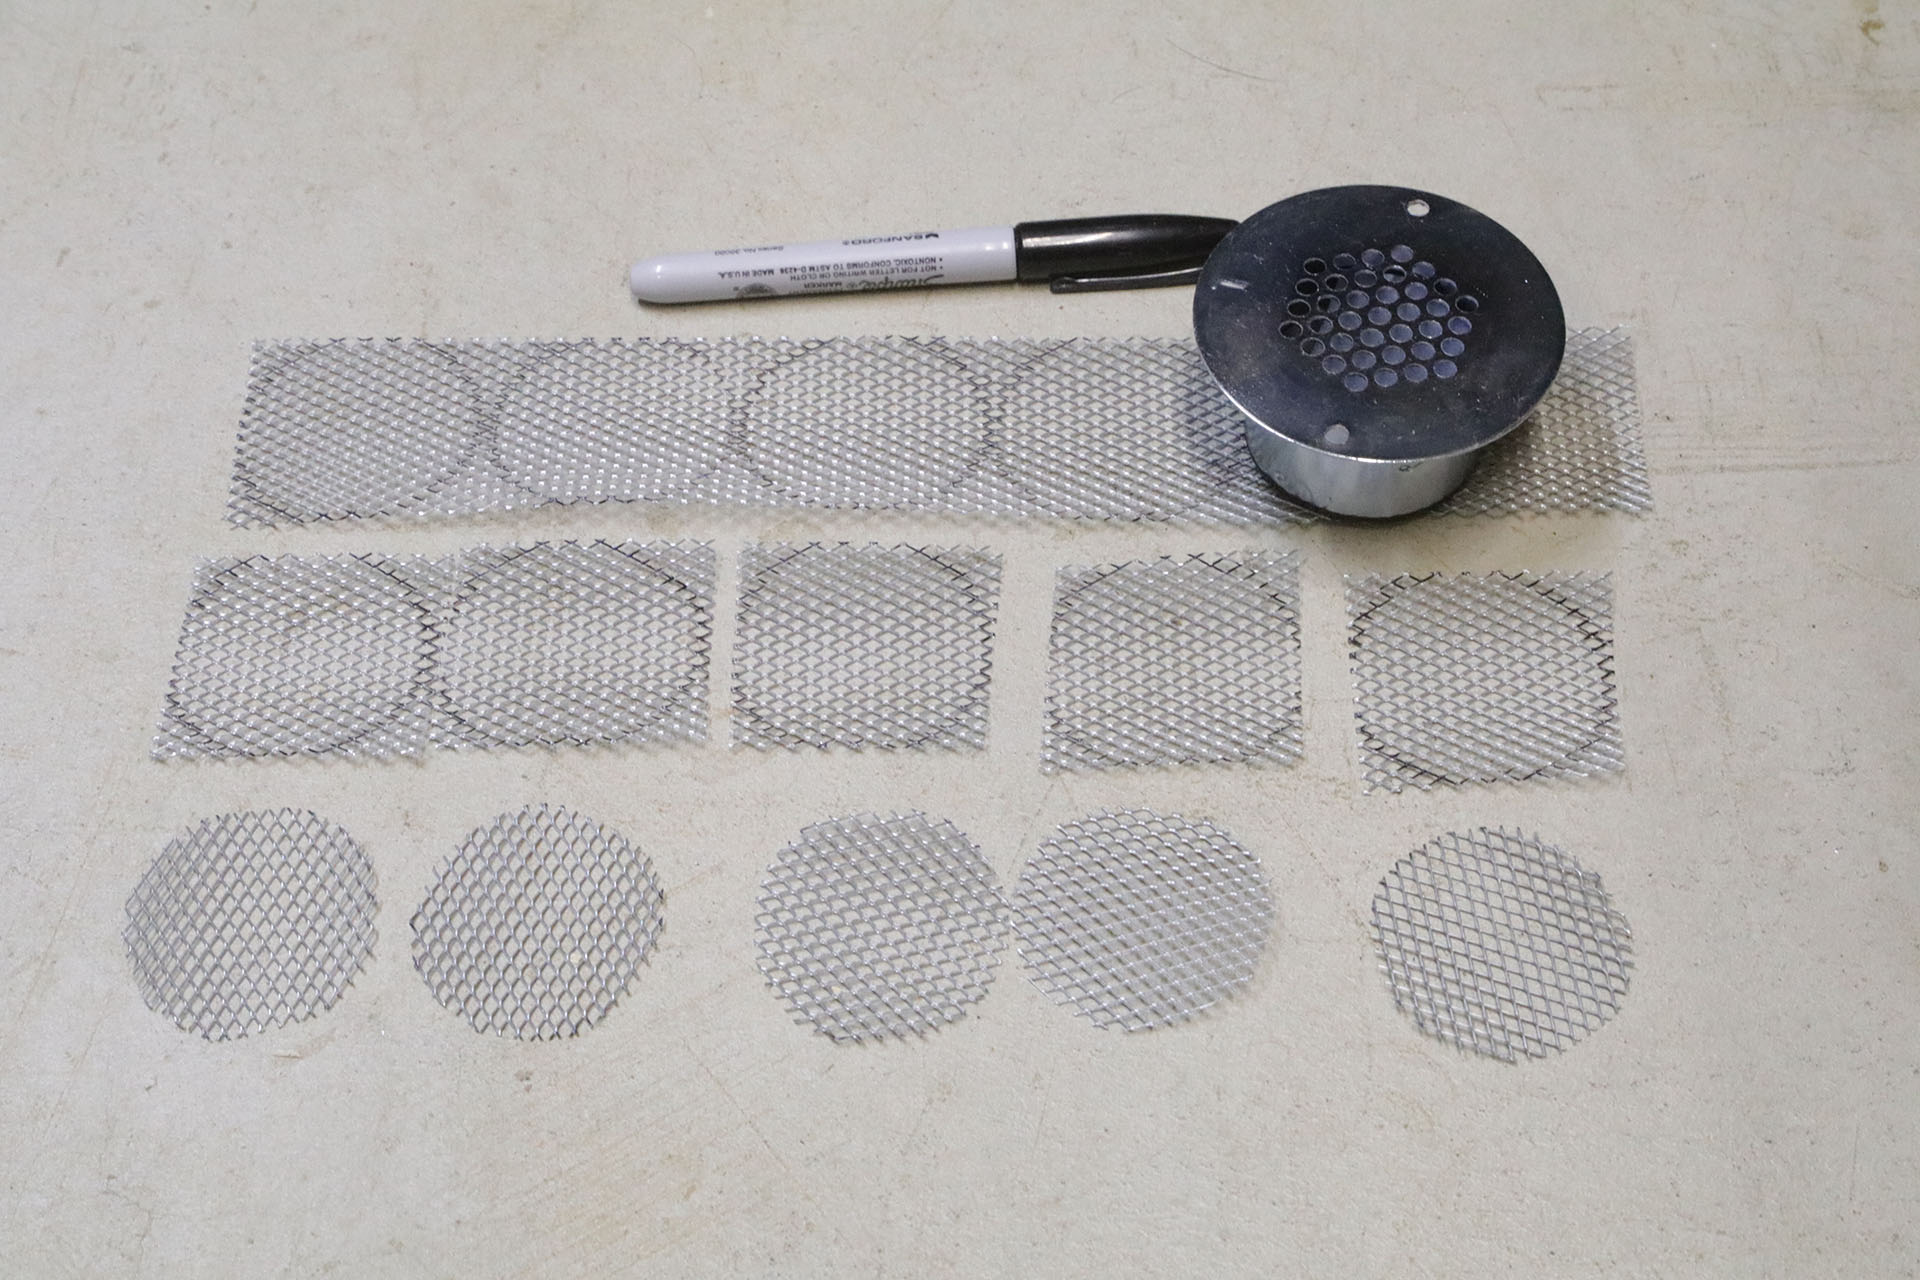
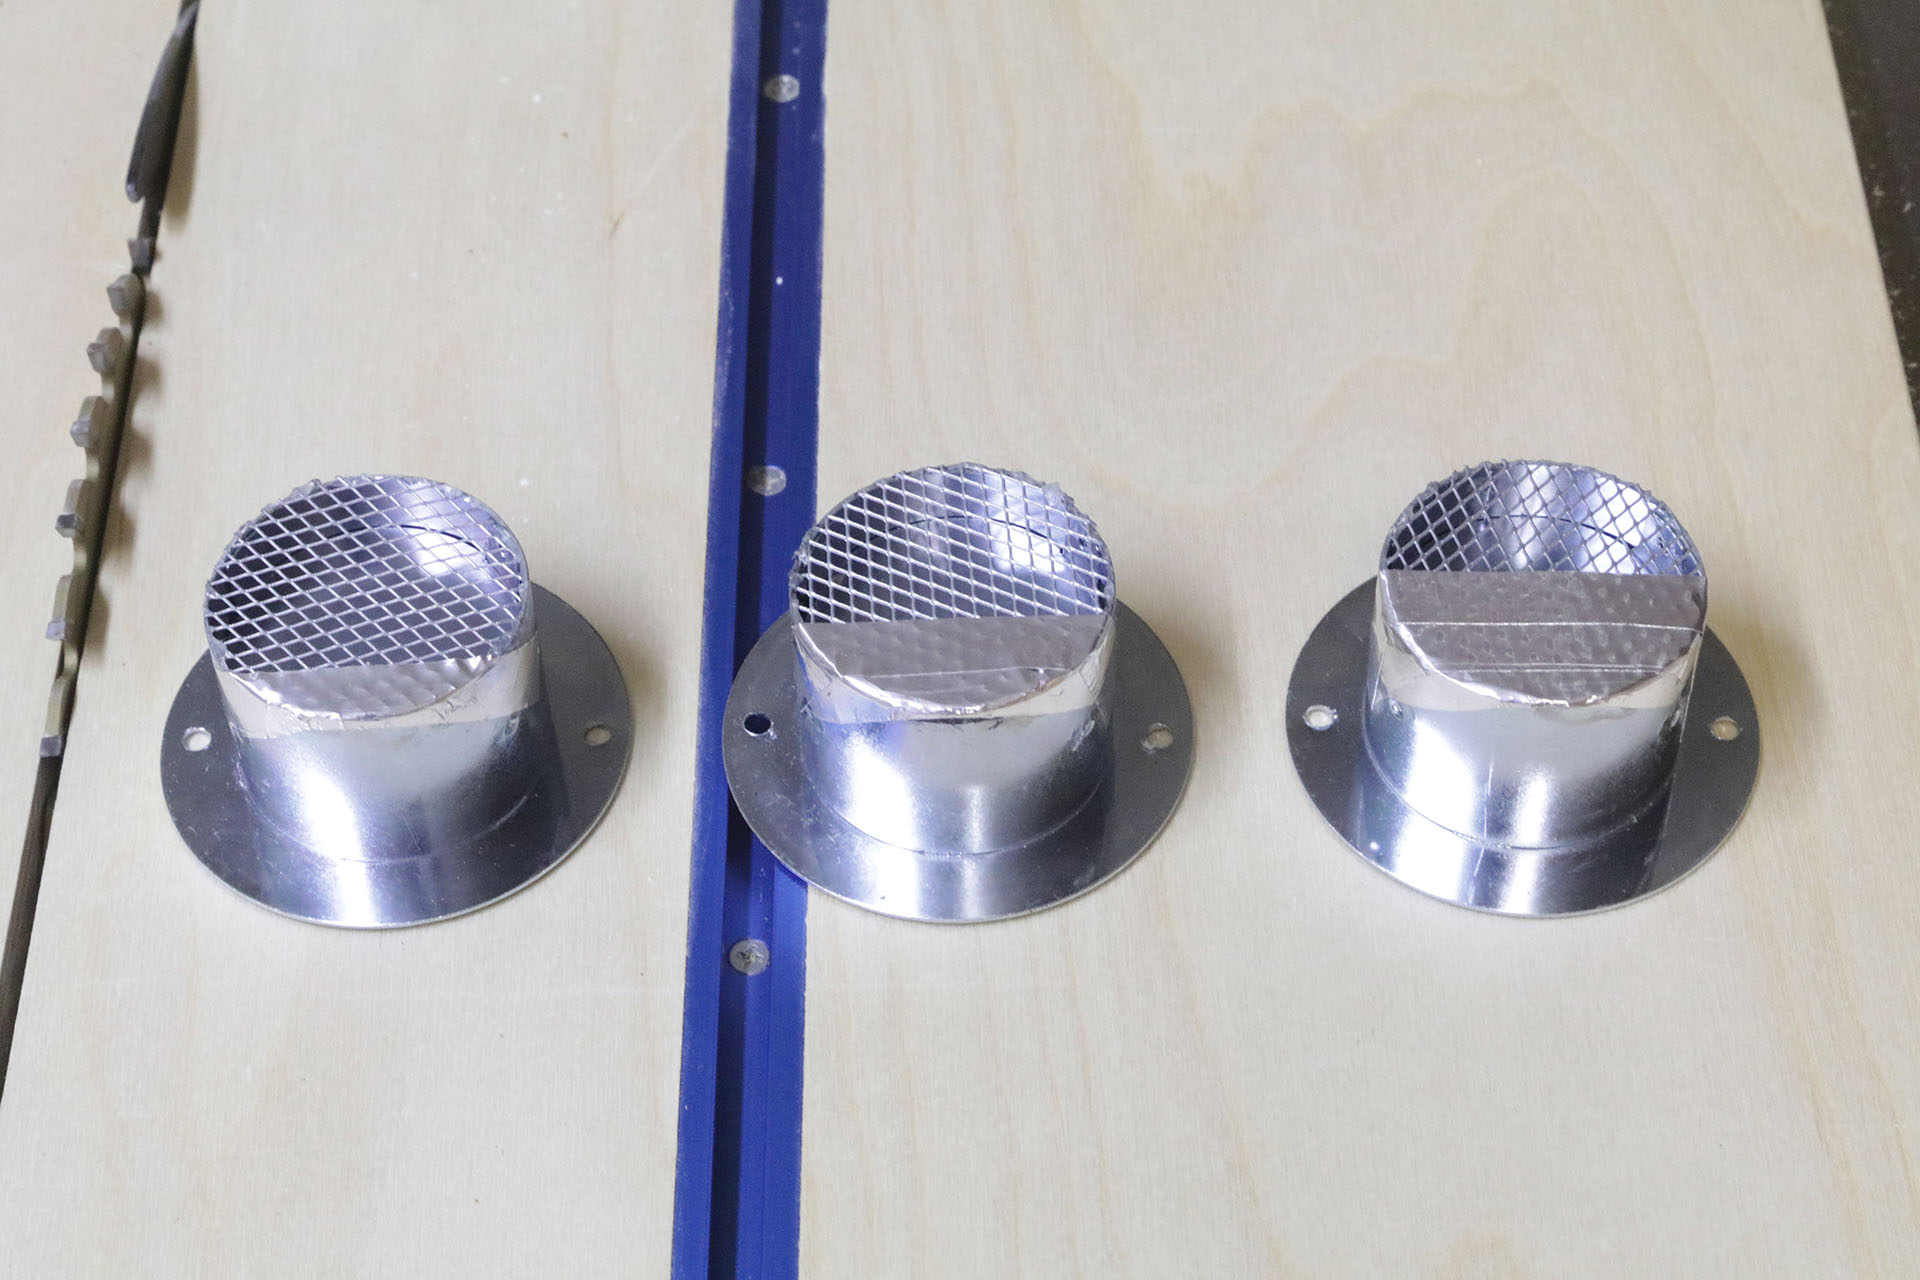
Since my screens were so large (1/4″) and loose, I thought about that and didn’t like it. I ended up cutting a 2″ circle of vent screen for the back of each vent. I attached these to the back of each Brandguard vent with little dabs of caulk. When I cut each circle out, I was careful not to leave it too big and extend beyond the edges, as it would make it difficult to fit into the holes. Then, trying to make another baffle on the back, I used 3 little thin strips of aluminum tape on the bottom 40% or so of the vent. Any embers getting past the 2nd Brandguard baffle would be stopped by the 1/8″ screen and baffle made of aluminum tape.
The Brandguard 2″ vents have a “T” for the top, make sure that goes up. I used a #8 screw, which was a bit large and I ended up having to drill the holes a little larger. Make sure and use a smaller screw than I did, perhaps these. I caulked around each hole, pushed the vent in, and put two screws in each vent. While you are up there, make sure and caulk around all the boards to seal up any cracks.
Home made hole vents
I had another outbuilding with 90 of these 2″ vent holes. I was too cheap to buy 90 more of the Brandguard 2″ vents, so came up with a method I thought would eliminate ember danger. To be clear, this is what I did, using an uncertified, untested method. If you decide to use this method, it’s at your own risk. I am not recommending this method, just putting it out there. Keep in mind this method was pretty tedious. But it was cheaper than 90 more Brandguard vents.
I started by painting the inside of each hole, so the aluminum tape I was going to use would stick better to the inside of the hole. Make sure and don’t clog the back screen with paint. Then I cut a bunch of aluminum tape about 1.5″ wide. I used my digital calipers set to 1.5″ and made a mark in the tape using the sharp edge, showing where to cut. I cut two pieces of tape, one for the bottom half of the hole, and one for the top half of the hole, long enough to overlap on each side a little bit. I put the tape in each hole.
Next, I used some stainless steel wool, and put a bit in each hole, trying to make sure it covered the entire hole top to bottom, but without putting too much and blocking the air flow. Be careful with this, if you do this. You don’t want to breath or have a piece of this go in your eye. Use goggles and maybe a mask to make sure you don’t accidentally breath a small piece of it. Remember, all this will be right above your head as you work on it.
Next, I cut 2″ circles of vent screen. Big enough they don’t fall in the hole, but just barely grab onto the sides. I then used little dabs of caulk to set these in place. Remember, when you paint – do not clog the vent screen with paint.
That’s it for those, I don’t think any embers will get past the stainless steel wool. Any landing in the stainless steel wool should just go out, as the walls of the hole are lined with aluminum tape. That outbuilding should be much safer from embers than it was. While I was there, I caulked up around the rafter tails, and made sure there were no cracks anywhere that embers could get into.
Garage Door Weatherstripping
My garage door had an old hardened rubber strip on the bottom that wasn’t doing much. It had nothing on the sides and top to stop embers from getting in the garage. The fire fighter I talked to said that weatherstripping should be added to seal that up.
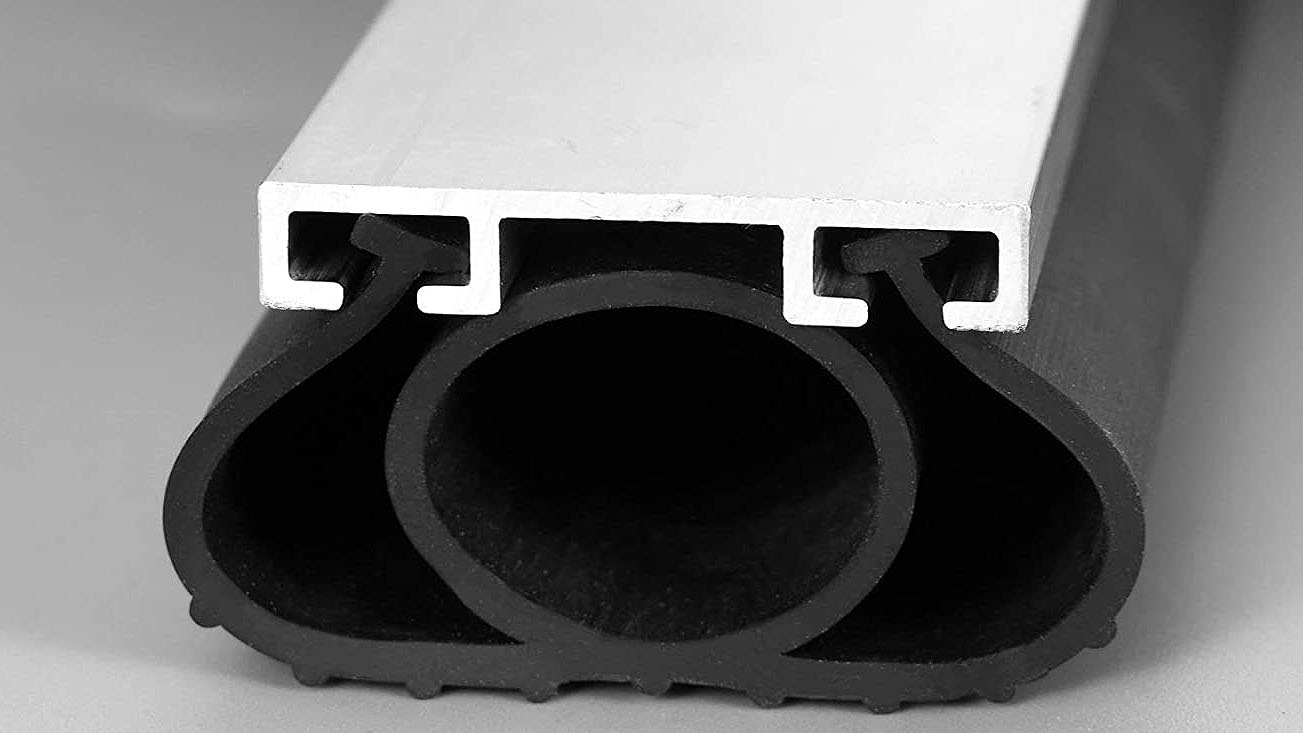
I started with the bottom of the door. I checked my existing weatherstrip piece, it was hardened and screwed directly to the door. A little research, and it seems many doors may have a T-track on the bottom of the door, that the weatherstripping slides into. This would make it easy to replace old weatherstripping. I found a flat piece of T-track that screws onto the bottom of the door and purchased that with the weatherstripping. If you already have the T track, you can get just the new weatherstripping piece, double check your garage door width before ordering.
The new T-track and weatherstripping for the bottom of the door was fairly easy to install. Patience is needed to get the weatherstrip piece slid in along the entire length of the door. I adjusted the stop point of the door with my opener, and got it closing so it slightly compresses the new weatherstrip and seals perfectly on the bottom of the door.
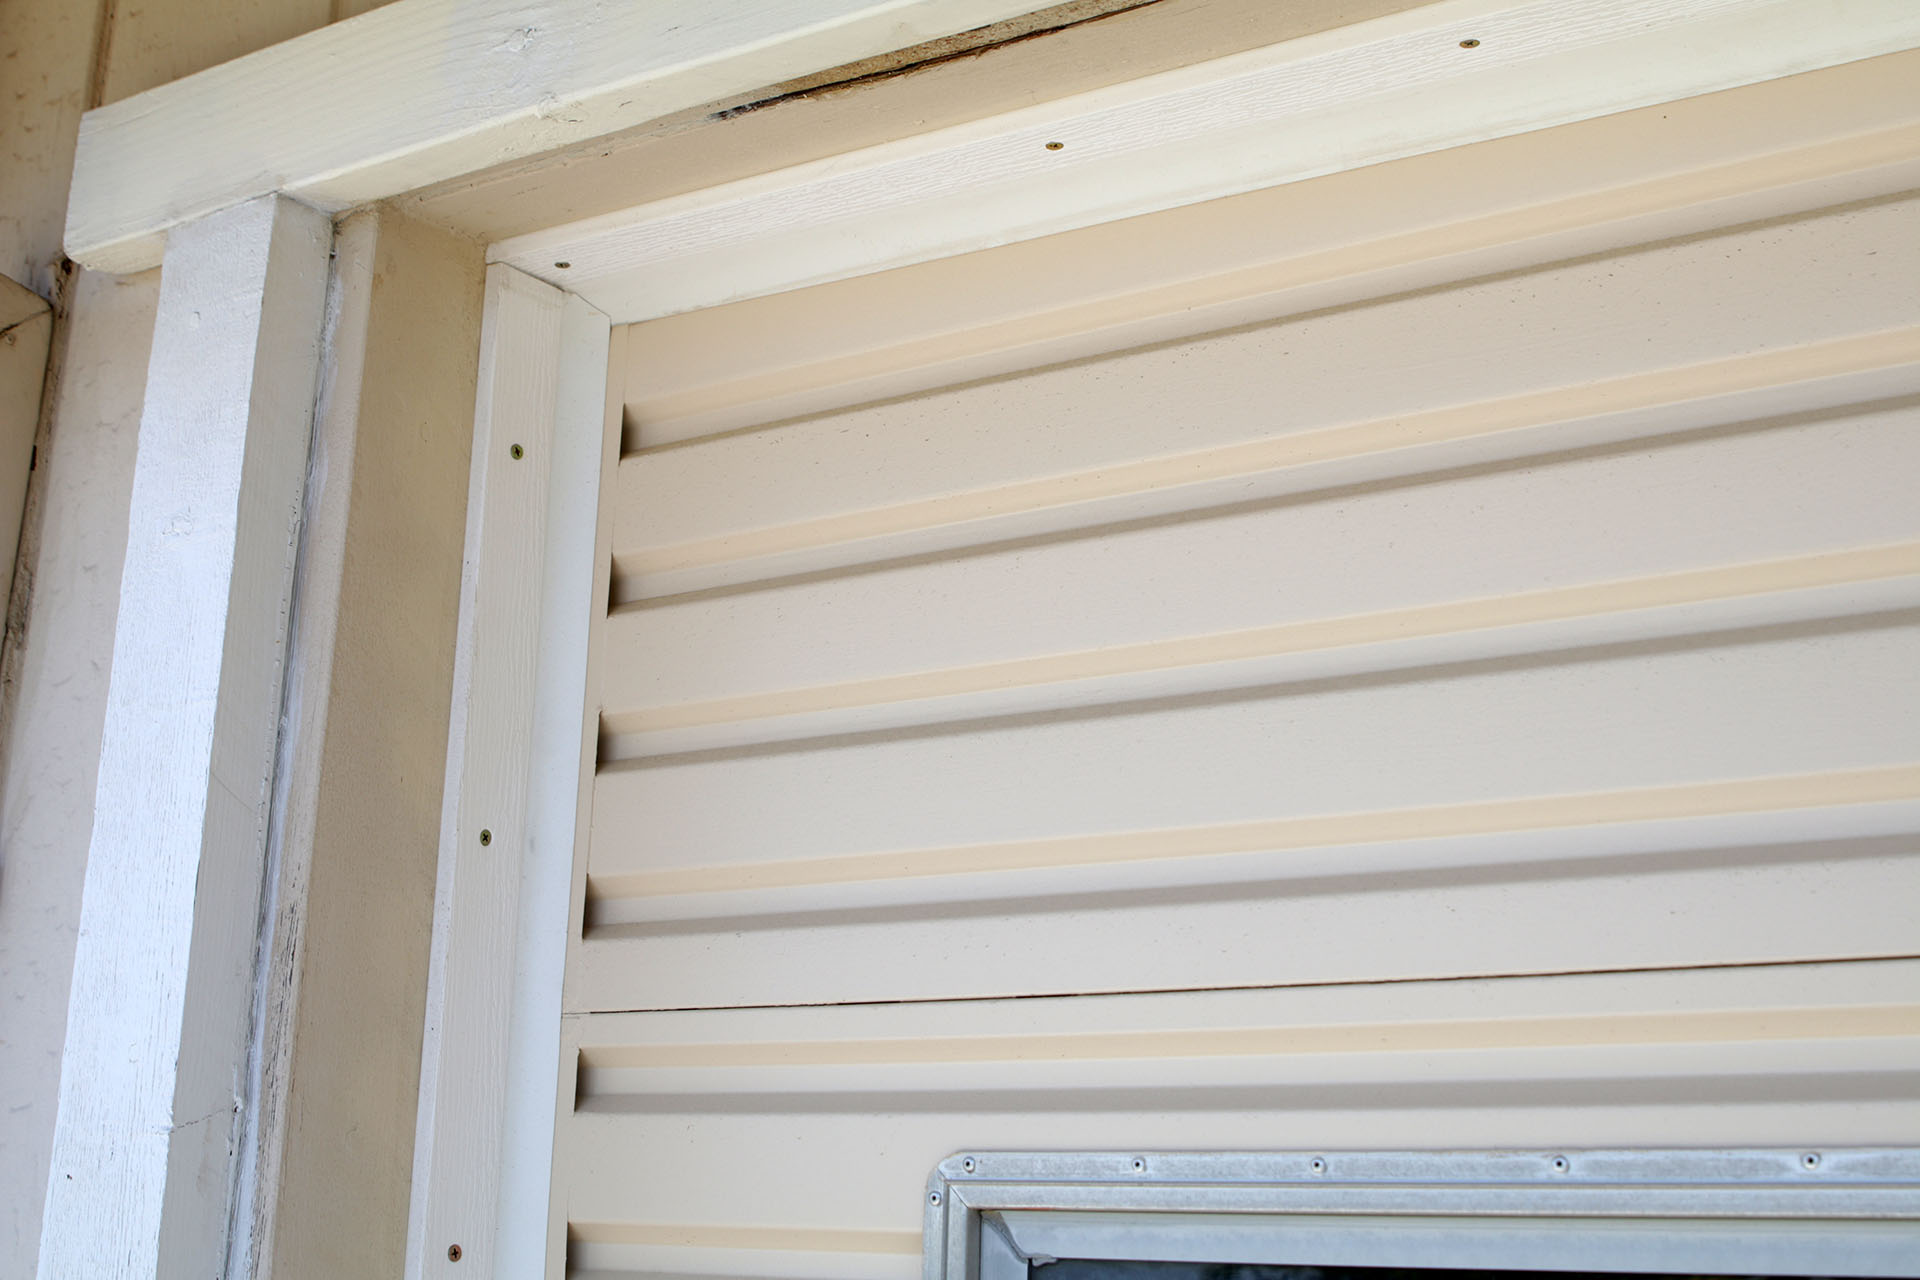
My door is probably somewhat unique, as it has the corrugated look to it, and any side weatherstrip pieces would not seal, because of the indented sections. Embers would be able to blow into the indented sections, and out into the inside of the garage. I was able to get some sheet metal pieces and rivet those onto the sides of the door so the weatherstrip could seal completely on those. While that still leaves an indented section under the sheet metal, the sheet metal butts against the end of the door, and the indented section is nothing but sheet metal, which the embers won’t bother, since they can no longer get out inside the garage. I sealed up the sheet metal pieces with a little paintable caulking, and repainted the door. Now the sheet metal pieces look like they came that way when the door was purchased.
Now I was ready to add the side and top weatherstrip pieces. This was pretty simple. I used a lot of screws, as the pieces do bend a little, and I didn’t want them to bend further over the months and years. I also caulked along the outside edge so water can’t get under the weatherstrip piece. The door is very well sealed now. I’ve also noticed the garage stays warmer and way less windy in the winter.
Deck
If you have a deck, these are another high danger area for wildfires. Of course, don’t store flammable objects, like firewood under your deck. Embers can land on the deck, and either catch debris on fire that is between the deck boards, or the embers can collect on top of joists between the deck boards and start a small fire there. That fire can burn towards the house (usually slowly, staying small right at the crack) and eventually catch it on fire.
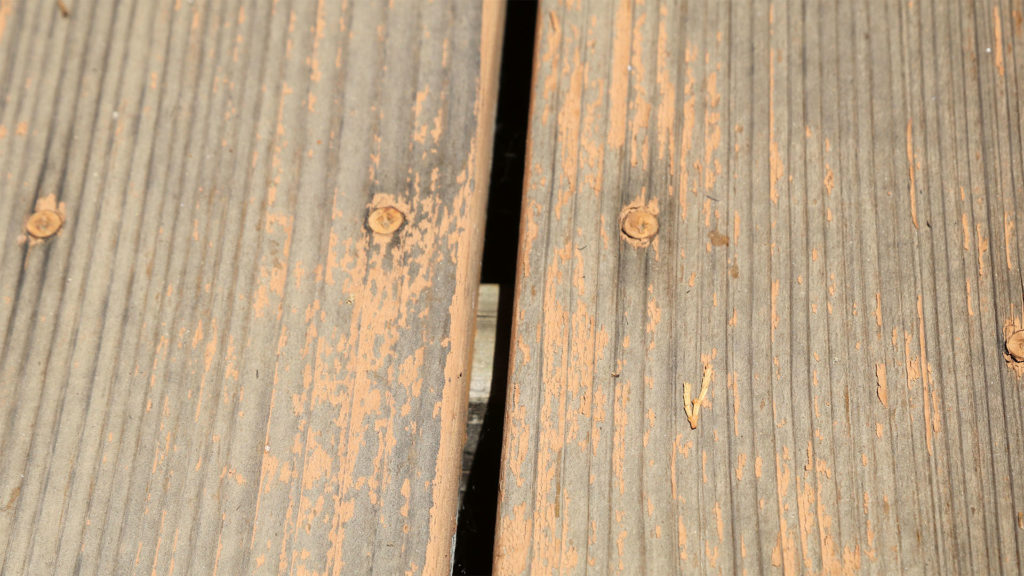
First – keep your deck clean. Keep the debris out from between the deck boards. I use a thin piece of steel strapping to run between the boards and keep that clear of leaves and pine needles. Also make sure and clear the debris sitting on top of the joists between the deck boards.
Some decks that are closer to the ground use a wooden lattice to keep animals from getting under the deck. But debris and embers can still blow in the holes in the lattice. There should be aluminum screen behind the lattice to make sure the area under the deck stays clean and embers can’t blow in there.
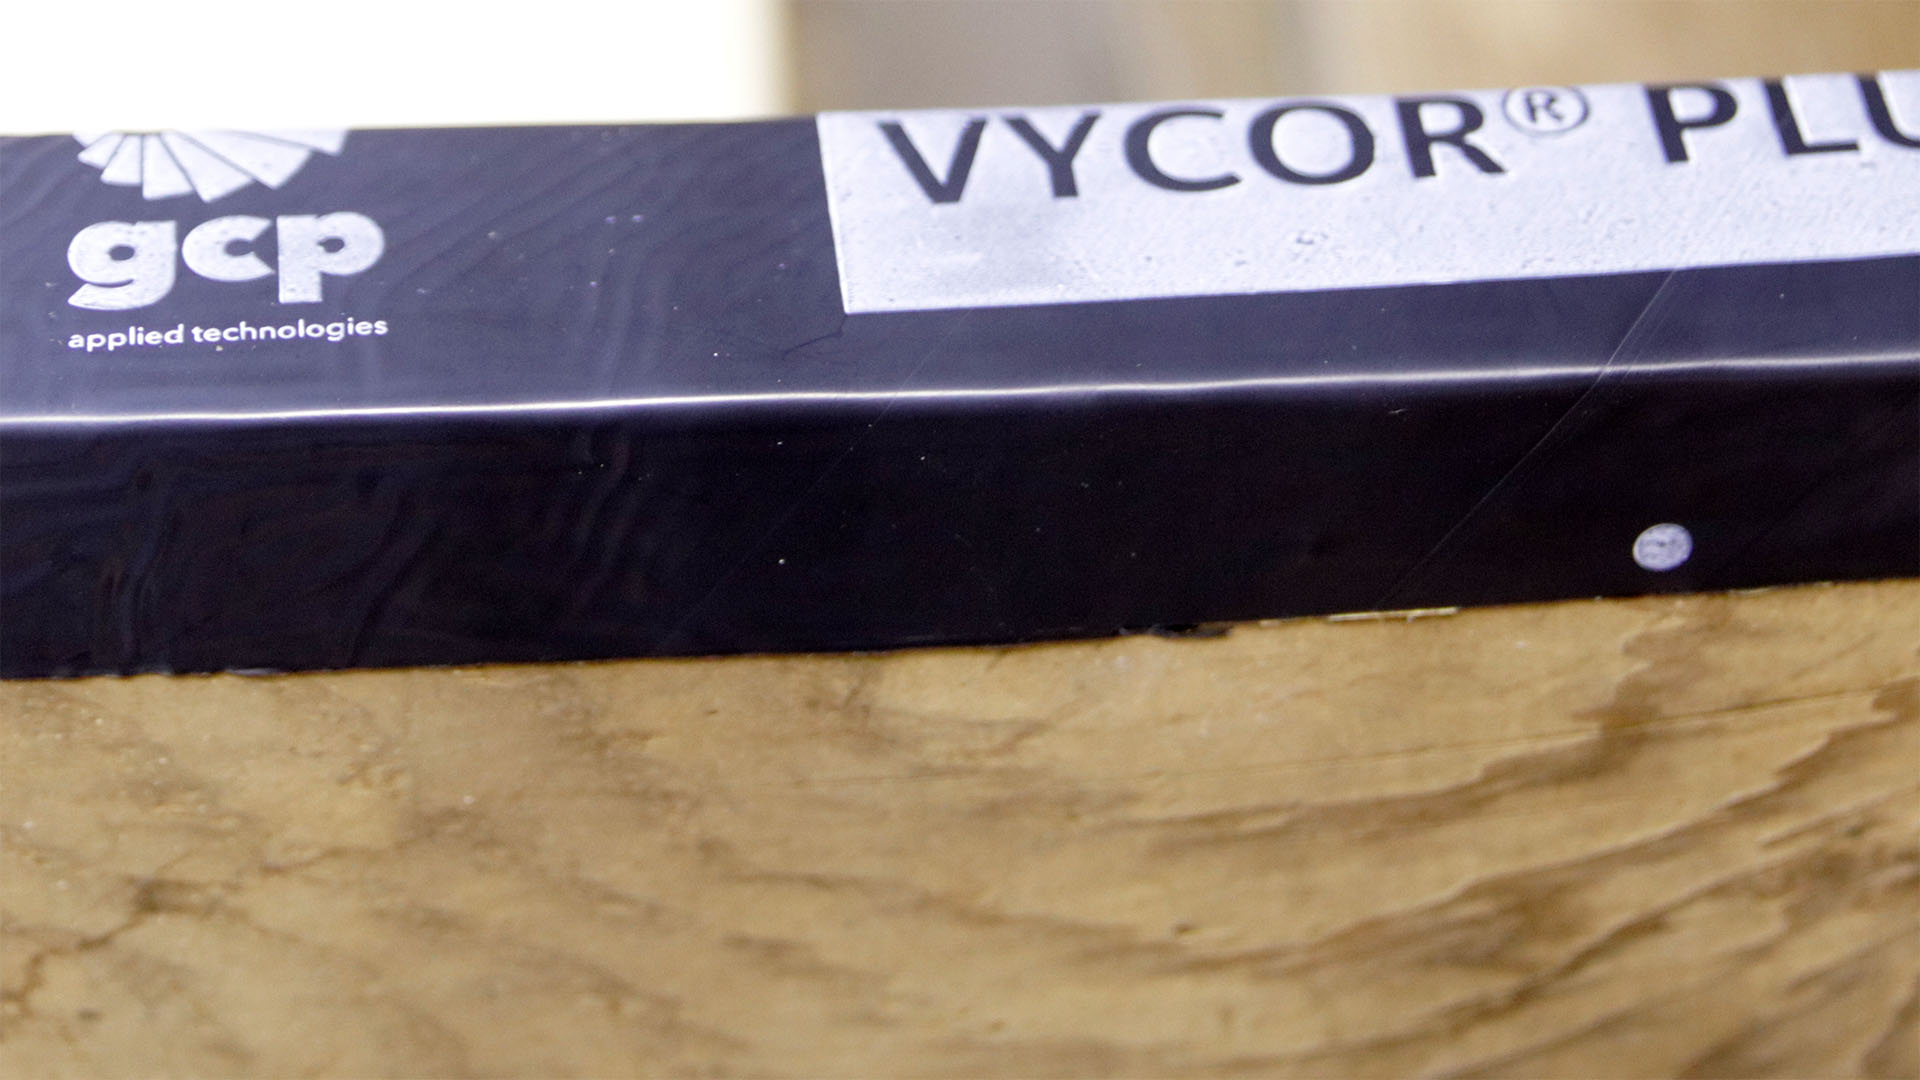
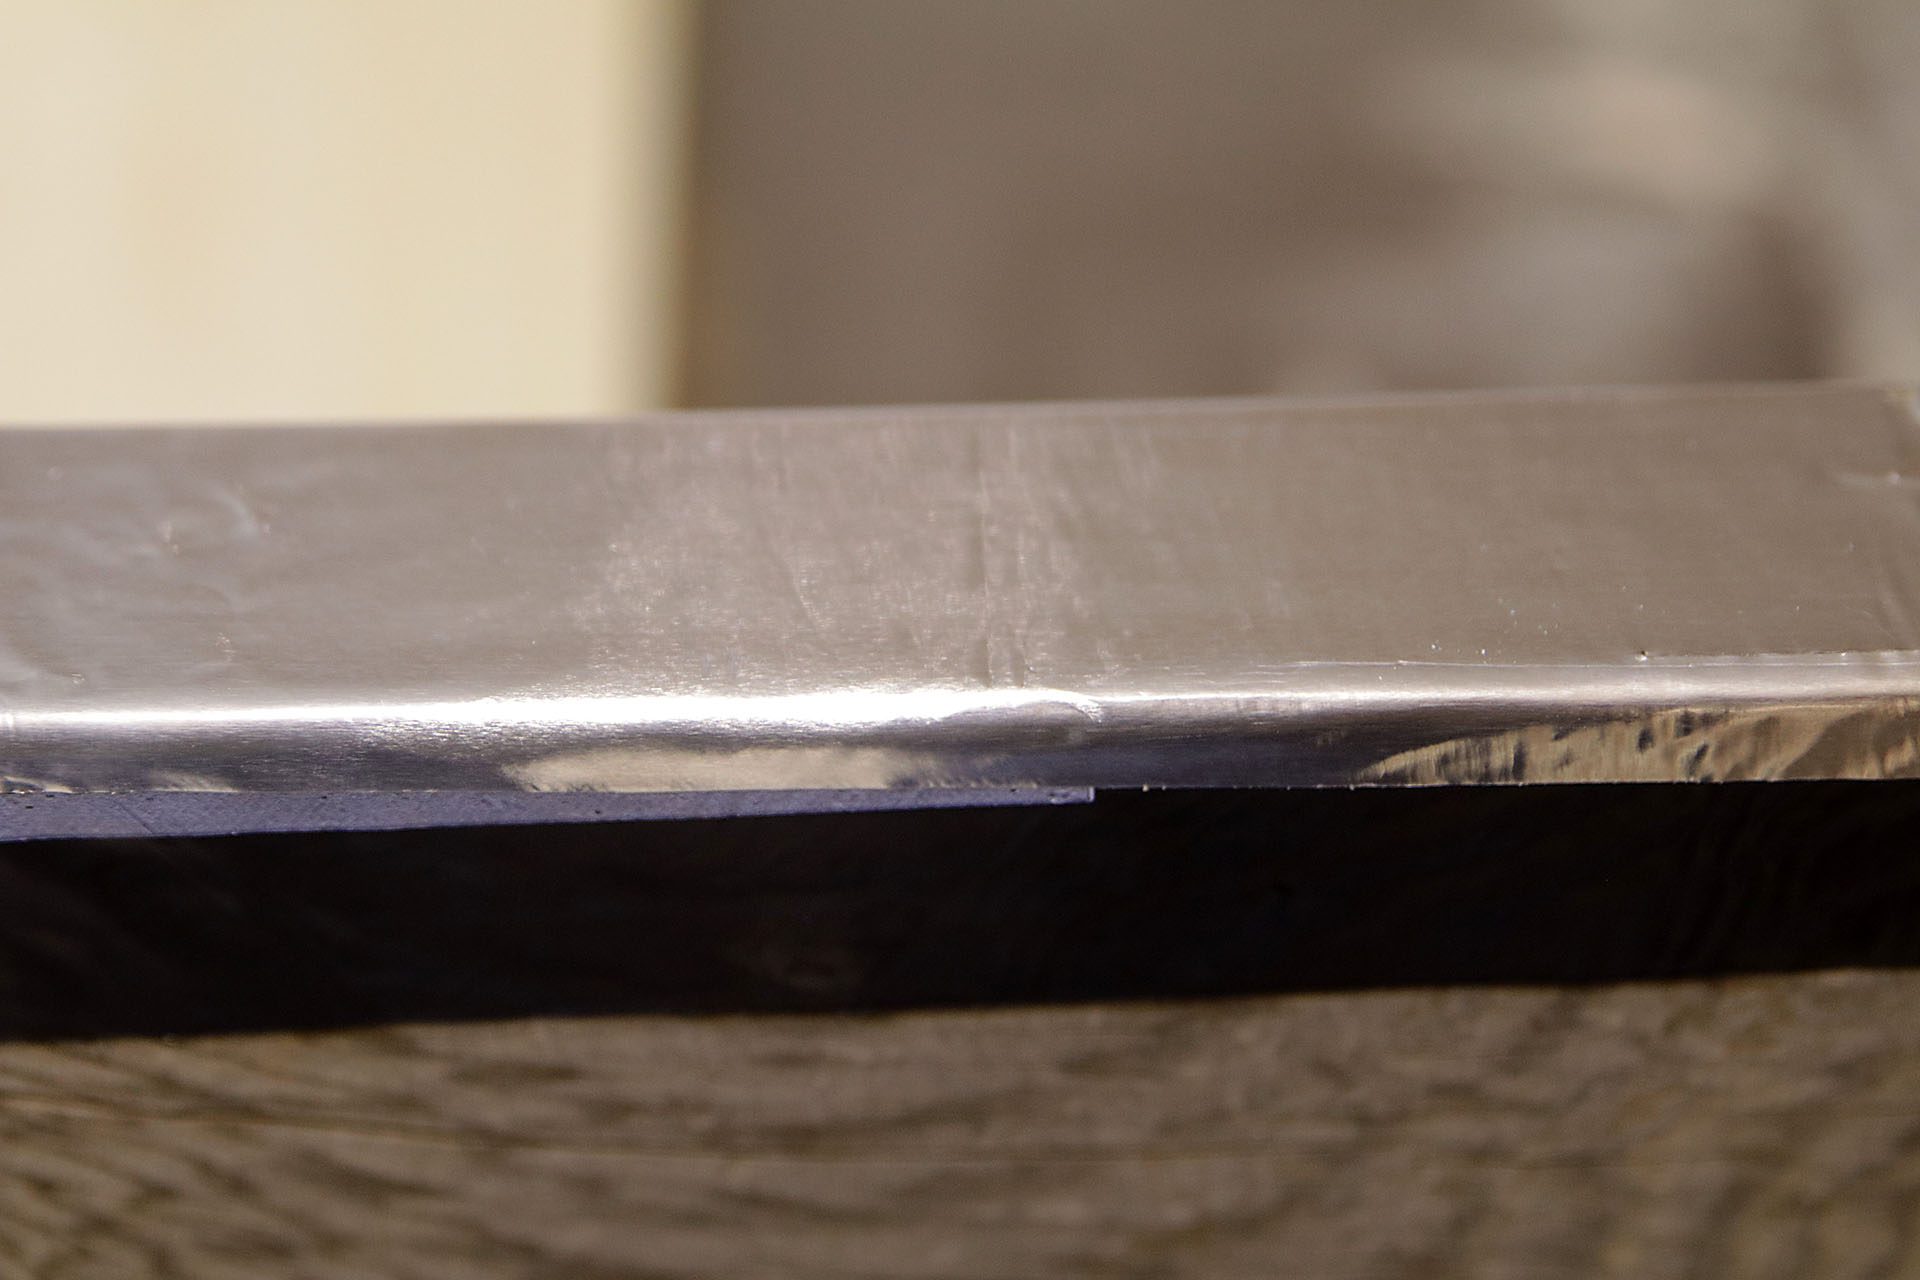
My deck is a second story deck I can walk under. I have nothing flammable stored under the deck. It is in need of a new coat of stain. I am planning on removing the deck boards before I stain it. I’ll be adding a self stick rubber sheet material on top of the joists, that helps keep the joists from rotting where the deck boards sit on top of them. You can either use the rubber material with a foil backing on top (I couldn’t find any of this), or add a layer of aluminum tape on top of the rubber sheeting on top of the joist. That way, when you put the deck boards back on, the top of the joists will be metal. Embers landing between the deck boards, on top of the joists, will be sitting on the aluminum tape, much less likely to catch fire.
By separating the boards a little more, it helps keep the area between them clean, and also makes the fire danger less. The deck boards should be closer to 1/4″ apart, instead of the maybe 1/8″ most builders install them.
My deck wasn’t done right to begin with, with the ledger board just bolted to the wood siding. I caulked that up, but over the years, I am sure that isn’t sealed up tight any more. With the deck boards off, I’ll be able to inspect that area. I’m planning on adding some aluminum flashing over that ledger board, that will not only protect that area more from water intrusion, but will also protect it from a burning deck. I’ll add to this part of the article, and add pictures when I get that part done.
Another idea I saw was to add small sheet metal pieces between the deck boards, above each joist. For example, each little piece of sheet metal might be 2.5″ long. If the gap between deck boards is 1/4″ wide, the little piece of sheet metal would need to be wider, as it is bent into a “V” shape, and inserted between the deck boards. The springiness of the sheet metal would hold the piece in place. These would have to be home made, I haven’t seen these available to purchase.
I’ll add more pictures to this section as I start working on the deck. The above pictures are a mock up of how I will be using the rubber and aluminum tape on top of the joists.
Paintable Caulk: https://amzn.to/3ij70W0
Aluminum tape: https://amzn.to/3dWpSH2
Vent screen (get width you need): https://amzn.to/3f0mpsl
goggles (works great with glasses): https://amzn.to/3dWlLL6
Fire Extinguisher: https://amzn.to/3e0wtA9
Hole Vents (Brandguard):
Sanding Drum: https://amzn.to/38fOMQB
Sanding Sleeve 1.5×1.5″: https://amzn.to/3eP7kcT
Screws: https://amzn.to/3e1mf2D
Hole Vents (Do it myself method):
Vent screen: https://amzn.to/3f0mpsl
Stainless steel wool: https://amzn.to/2YPcQGS
Garage Door:
Bottom Seal + T Track (pick width): https://amzn.to/3gkmmYq
Bottom weatherstrip: https://amzn.to/38dGSaq
Sides and top weatherstrip: https://www.lowes.com/pd/Royal-Building-Products-7-ft-x-1-3-4-in-White-PVC-Garage-Weatherstrip/1000444093
Deck:
Buytl: https://amzn.to/38uvqrn
Aluminum tape: https://amzn.to/3eSjWjw
Tools Used:
DeWalt Drill/Driver set (very nice!): http://amzn.to/2BpDMC7
Tin Snips: https://amzn.to/2C9sBj2
Camera Equipment:
80D: http://amzn.to/2EUq5KV
Lens: http://amzn.to/2CdJKCs